Wednesday, October 28, 2009

Install Tomcat 5.5 in Linux

1. Necessary packages
veeresh@veeresh-desktop:~$ sudo apt-get install tomcat5.5 tomcat5.5-admin tomcat5.5-webapps

2. Directories
/usr/share/tomcat5.5/
/usr/share/tomcat5.5-webapps/
/etc/tomcat5.5
/var/lib/tomcat5.5
/var/log/tomcat5.5

3. Remember to export JAVA_HOME, for example (put in .bashrc)
veeresh@veeresh-desktop:~$ export JAVA_HOME=/usr/lib/jvm/java-6-openjdk/

Launch tomcat5.5 using

veeresh@veeresh-desktop:~$ sudo /etc/init.d/tomcat5.5 start
veeresh@veeresh-desktop:~$ sudo /etc/init.d/tomcat5.5 restart

4. Configuration for using Tomcat Manager (http://localhost:8180/manager/html) and Tomcat Administration (http://localhost:8180/admin).

5. Open the browser and enter: http://localhost:8180/

Monday, October 26, 2009

Samba Server

If you want to share files between your Ubuntu and Windows computers, your best option is to use Samba file sharing.

To install, first open a terminal window and enter the following command:

sudo apt-get install samba smbfs

We’ve got samba installed, but now we’ll need to configure it to make it accessible. Run the following command to open the configuration file, substituting your editor of choice:

sudo gedit /etc/samba/smb.conf

Find this section in the file:

####### Authentication #######

# “security = user” is always a good idea. This will require a Unix account
# in this server for every user accessing the server. See
# /usr/share/doc/samba-doc/htmldocs/Samba-HOWTO-Collection/ServerType.html
# in the samba-doc package for details.
; security = user

Uncomment the security line, and add another line to make it look like this:

security = user
username map = /etc/samba/smbusers

This will set Samba to use the smbusers file for looking up the user list.

Create a Samba User

There are two steps to creating a user. First we’ll run the smbpasswd utility to create a samba password for the user.

sudo smbpasswd -a

Next, we’ll add that username to the smbusers file.

sudo gedit /etc/samba/smbusers

Add in the following line, substituting the username with the one you want to give access to. The format is = “”. You can use a different samba user name to map to an ubuntu account, but that’s not really necessary right now.

< username > = “< username >”

Now you can create samba shares and give access to the users that you listed here.

Share User Home Directories


Wednesday, October 21, 2009

Installing gdesklets

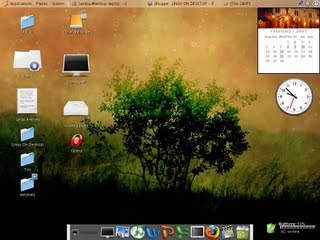
gdesklets gives user a collection of impressive widgets that can be placed on desktop this is similar to feature available on Windows Vista and Mac OS X , it does provide quite a good look to the desktop.

To install gdesklets issue the following command at the command line
sudo apt-get install -y gdesklets
after installation go to (System -> Preferences -> Sessions) There go to Start up program and add gdesklets shell , now every time gnome loads
up you should see your gdesklets on the desktop.

Installing the extra multimedia codecs,players

Now you would surely want to install all the codecs for playing various media files and the players primarily xine,vlc,mplayer issue the following commands to install the multimedia codecs.

sudo apt-get install gstreamer0.10-pitfdll gstreamer0.10-ffmpeg gstreamer0.10-glgstre am er0.10-plugins-base gstreamer0.10-plugins-good gstreamer0.10-plugins-bad gstreamer0.10-plugins-bad-multiverse gstreamer0.10-plugins-ugly gstreamer0.10-plugins-ugly-multiverse libx ine-extracodecs w32codecs vlc mplayer

Installing unrar

RAR is one of the very widely used archives on Windows , however unrar tool to decompress RAR is not shipped with distribution and has ti be installed manually.

sudo apt-get -y install unrar

Installing MPlayer with all codecs and dvd playing support

MPlayer is one of the most popular media player available on linux , it supports playing all the major audio/video file formats . With w32codecs and libdvdcss2 it plays all the major audio/video format,however w32codecs has dll files from windows operating system hence its not available on the ubuntu official repositories and needs to be downloaded from the mediubuntu repositories.

To install MPlayer with all codecs type in the following command in the terminal window : -
sudo apt-get install mplayer
and

sudo apt-get install w32codecs libdvdcss2
After completing above steps you could launch MPlayer by typing in gmplayer in the terminal window or from (Application -> Sound & Video -> MPlayer Movie Player )

RealPlayer

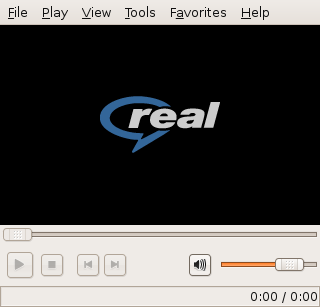
Realplayer is one of the most popular cross platform media player available on Windows,Linux , Mac OS and a number of other platform . RealPlayer plays popular .rm ,rmvb,.mp3 and other media formats.

To install RealPlayer first download RealPlayer10GOLD.bin from http://www.real.com/linux/ assuming you have downloaded it to your home directory.

After downloading the file go to the directory where you have downloaded the file in terminal window and type
After installation is over type on the terminal
¨chmod +x RealPlayer10GOLD.bin¨
and
¨sudo ./RealPlayer10GOLD.bin¨
for installation to begin. Follow the instructions as presented to complete installation.
After installation is over you can launch Real Player from (Application -> Sound & Video -> Real Player 10 ).


Google Desktop Search

Google Desktop allows one to full text search of a user's e-mail, computer files, music, photos, chat, and Web pages viewed,OpenOffice documents , PDF files and more . Now similar tools already existed on Linux like beagle (supported by novell ) , meta tracker etc . However Google Desktop search is not based on any of these tools and uses its proprietary algorithms to search for files on the computer ,also being 1.0 release and more stable then these products it could be preferred over tools like beagle . To install type the following command in the terminal window : -
wget http://dl.google.com/linux/google-repo-setup.sh sudo bash google-repo-setup.sh Now after completing above steps to install Google Desktop Search type the following command in the terminal window : - sudo apt-get update sudo apt-get install google-desktop-linux
After completing above step logout of gnome session and relogin you would find the dialog window as shown.

select the appropriate option : -
Now after choosing appropriate option you would find Google Desktop icon in the system tray icon. Now it would automatically scan and index files on computer and store it in local database which could be searched using web browser.

Tuesday, October 20, 2009

How to setup Java classpath in Ubuntu?

The CLASSPATH is an environment variable that tells the Java compiler where to look for class files to import. CLASSPATH is generally set to a directory or a JAR(Java Archive) file.
It depends on what implementation of java you have installed, where it is installed, and a number of other things. Suppose in my system look like this:

open the terminal:

veeresh@veeresh-desktop:~$ JAVA_HOME=/usr/lib/jvm/java-6-openjdk/
veeresh@veeresh-desktop:~$ CLASSPATH=$CLASSPATH:/usr/lib/jvm/java-6-openjdk/bin
veeresh@veeresh-desktop:~$ export CLASSPATH
veeresh@veeresh-desktop:~$ echo $CLASSPATH
:/usr/lib/jvm/java-6-openjdk/bin

where ":" indicates appending new path to existing path.

How to Install Oracle

Installing Oracle on Ubuntu is fairly easy, since Oracle has created a Debian and Ubuntu package repository, so it is possible to download and install the Oracle database software using apt-get and aptitude.

Howto use the Oracle Debian and Ubuntu Repository:

Add the following lines to the /etc/apt/sources.list

# Oracle Repository
deb http://oss.oracle.com/debian unstable main non-free

Update the package repository database with:

cc@ray:~$ sudo apt-get update

Now you should be able to install the following Oracle software:

  • libaio
  • oracle-xe-client
  • oracle-xe
  • oracle-xe-universal

Install the Oracle Express packages

sudo aptitude install oracle-xe oracle-xe-client

Configure using:

sudo /etc/init.d/oracle-xe configure

Access the nice Oracle web interface by pointing your Firefox to:

http://127.0.0.1:8080/apex

Installing Macromedia Flash support and Sun Java JRE

Both Macromedia Flash and JRE are an important part of internet experience almost all the websites use either of the two technology to add extra functionality to the web page . By default Ubuntu does not come preinstalled with support for these two , however they can be installed quite easily by typing in the following command in the terminal window:
sudo apt-get install flashplugin-nonfree
and to install Sun Java JRE type:
sudo aptitude install sun-java6-jre sun-java6-plugin sun-java6-fonts

Installing Linux DC++ Client

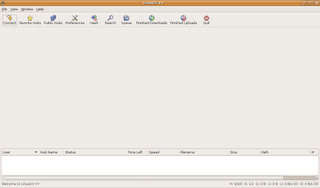
DC++ is a popuar tool used for p2p file sharing and is especially popular in college campuses , to install dc++ for linux follow the following instructions .

Type the following command in the terminal window: -
sudo apt-get install linuxdcpp
And after completing above step launch dcpp from (
Applications -> Internet -> DC++)


Linux Client of popular DC++ Application

M.Tech CSE II year
Project
: Cloud Computing

CLOUD computing is an emerging computing paradigm which combines the technologies like grid computing utility computing, virtualization and clustering to provide a set of services to the cloud customer. Cloud is a higher level abstraction, where the underlying hardware and software details are hidden from the user. The end user can avail the various services provided by the cloud to build his/her applications.
The services that can be provided from the cloud includes Software as a Service (SaaS), Platform as a Service (PaaS) and Infrastructure as a Service (IaaS). Software as a Service rent applications functionality from the service provider so that the client can avoid purchasing, installing and running the software necessary for the application. Salesfroce.com is one such company which is providing the service of this type. In Platform as a Service, the idea is to provide the necessary platform for developing and executing the client application. Google and Microsoft are two major players in providing PaaS. In PaaS, the services provided include database management, security, Work flow management, application serving. The computational power and storage space required for the application are also offered as a service from the cloud which is known as Infrastructure as a Service.

Problem Statement

To achieve semantic interoperability between web applications (such as JSP, PHP) using XML. Development of algorithms for prototype implementation to test the methodology specifically by converting JSP to PHP and PHP to JSP using XML as an intermediate representation.

For more details:
http://sites.google.com/site/cloudcomputingfamily/


Programming Skills
Every body knows C/C++ basically. I have very much fond of Java.


Linux Basics

1. Creating Linux Partitions

After booting the installation media, run fdisk by typing

fdisk <drive>

where drive is the Linux device name of the drive you plan to add partitions. For instance, if you want to run fdisk on the first SCSI disk in your system, use the command fdisk /dev/sda. /dev/hda (the first IDE drive) is the default if you don't specify one.

If you are creating Linux partitions on more than one drive, run fdisk once for each drive.

veeresh@veeresh-desktop:~$ sudo fdisk /dev/hda

Command (m for help):

Here fdisk is waiting for a command; you can type m to get a list of options.

Command (m for help): m
Command action
a toggle a bootable flag
d delete a partition
l list known partition types
m print this menu
n add a new partition
p print the partition table
q quit without saving changes
t change a partition's system id
u change display/entry units
v verify the partition table
w write table to disk and exit
x extra functionality (experts only)

Command (m for help):p

Disk /dev/hda: 16 heads, 38 sectors, 683 cylinders
Units = cylinders of 608 * 512 bytes

   Device Boot  Begin   Start     End  Blocks   Id  System
/dev/hda1 * 1 1 203 61693 6 DOS 16-bit >=32M
Command (m for help):
In this example, we have a single MS-DOS partition on /dev/hda1, which is 61693 blocks (about 60 megs).This partition starts at cylinder number 1, and ends on cylinder 203. We have a total of 683 cylinders in this disk; so there are 480 cylinders left to create Linux partitions on.

To create a new partition, use the n command. In this example, we'll create two primary partitions (/dev/hda2 and /dev/hda3) for Linux.

Command (m for help): n
Command action
e extended
p primary partition (1-4)
p

Here, fdisk is asking the type of the partition to create: extended or primary. In our example, we're creating only primary partitions, so we choose p.

Partition number (1-4):

fdisk will then ask for the number of the partition to create; since partition 1 is already used, our first Linux partition will be number 2.

Partition number (1-4): 2
First cylinder (204-683):

Now enter the starting cylinder number of the partition. Since cylinders 204 through 683 are unused, we'll use the first available one (numbered 204). There's no reason to leave empty space between partitions.

First cylinder (204-683): 204
Last cylinder or +size or +sizeM or +sizeK (204-683):

fdisk is asking for the size of the partition to create. We can either specify an ending cylinder number, or a size in bytes, kilobytes, or megabytes. Since we want our partition to be 80 megs in size, we specify +80M. When specifying a partition size in this way, fdisk will round the actual partition size to the nearest number of cylinders.

Last cylinder or +size or +sizeM or +sizeK (204-683): +80M

Warning: Linux cannot currently use 33090 sectors of this partition

If you see a warning message such as this, it can be ignored. fdisk prints the warning because it's an older program, and dates before the time that Linux partitions were allowed to be larger than 64 megabytes.

Now we're ready to create our second Linux partition. For sake of demonstration, we'll create it with a size of 10 megabytes.

Command (m for help): n
Command action
e extended
p primary partition (1-4)
p
Partition number (1-4): 3
First cylinder (474-683): 474
Last cylinder or +size or +sizeM or +sizeK (474-683): +10M

At last, we'll display the partition table. Again, write down all of this information---especially the block sizes of your new partitions. You'll need to know the sizes of the partitions when creating filesystems, later. Also, verify that none of your partitions overlap.

Command (m for help): p

Disk /dev/hda: 16 heads, 38 sectors, 683 cylinders
Units = cylinders of 608 * 512 bytes

   Device Boot  Begin   Start     End  Blocks   Id  System
/dev/hda1 * 1 1 203 61693 6 DOS 16-bit >=32M
/dev/hda2 204 204 473 82080 81 Linux/MINIX


/dev/hda3 474 474 507 10336 81 Linux/MINIX

As you can see, /dev/hda2 is now a partition of size 82080 blocks(which corresponds to about 80 megabytes), and /dev/hda3 is 10336 blocks (about 10 megs).

Finally, we use the w command to write the changes to disk and exit fdisk.

Command (m for help): w

Thus Linux partitions are created successfully.


2. How to setup Internet connection in linux environment?
All of us know about setting ipaddress details in Network connections icon which is on system tray. To setup permanently follow the steps:
open the terminal:
veeresh@veeresh-desktop:~$ sudo su
[sudo] password for veeresh: *****
veeresh@veeresh-desktop:~$ gedit /etc/network/interfaces
auto lo
iface lo inet loopback
iface eth0 inet static
address 192.168.3.182
netmask 255.255.255.0
gateway 192.168.3.1
auto eth0
veeresh@veeresh-desktop:~$ gedit /etc/resolv.conf
search localdomain
nameserver 192.168.254.2
nameserver 192.168.254.3
veeresh@veeresh-desktop:~$ /etc/init.d/networking restart
Note: In fedora use setup command on the terminal to configure the ipaddress.

3. Tool for CD/DVD R/W k3b (like Neuro 7 in Windows)
K3b is a CD and DVD writing ('burning') application.

Key Features
  • KDE-friendly application
  • Write data disks
  • Write audio disks
  • Write 'images' to disk (e.g. Linux distributions)
  • Copy disks
Installation
open the terminal:
veeresh@veeresh-desktop:~$ sudo apt-get install k3b
After successful installation
veeresh@veeresh-desktop:~$ k3b